Showing posts with label halloween. Show all posts

Monday, November 13

Halloween, part 2 (the girls)

Or: how to put together 5 costumes (with a surprise 6th 2 weeks early) on a budget

And now . . .  the girls’ costumes!

Raspberry had a very particular character outfit (one of several in said character’s movie), also cosplay level. Peach actually decided to re-wear one of her costumes from a previous year and 
Strawberry picked a character with an iconic (and set) look.

Raspberry:
This year Raspberry decided that she wanted to be Mulan. Specifically, Mulan from the rooftop fight scene 
in the 1st movie.


 Ok, lots of layering, some pretty specific colors, 
but overall very do-able.

The bottom layer is a white, greek goddess costume dress. The blue v-neck originally had puff sleeves (I made the trim out of the same remnant fabric as the waist piece and some blue ribbon), and the pink sash is actually blanket binding (I could not find ribbon in the right color that was wide enough or the right type of fabric). I bought the shoes at a discount store and took a plastic dollar store fan 
and used yellow satin from my craft supplies to 
make it match the one she uses to disarm Shan Yu.

 White dress, blue v-neck blouse, fan: $1 each
Light blue long sleeve shirt: $2.50  
Shoes: $3  Remnant fabric: $1.50  
blanket binding: $3 after coupon
Blue ribbon: $3 after coupon  
Satin and thread from craft supplies: $0
Total: $16

Peach:
Normally, I don’t let the kids reuse costumes 
(the birthday pictures get hard to identify if the kid is dressed the same every year) but due to my parents moving (my dad had been our photographer since the girls turned 2) we missed a year of pictures. 

Peach had found that year’s costumes hanging in the closet and insisted on being Hello Kitty again on the basis that they didn’t do birthday pictures that year, so there wouldn’t be a problem with her re-wearing the costume. 

After this argument, I just decided to go with it.

Her costume dress had lost a few crystals and she needed new shoes and tights as well as a long sleeve shirt for under her dress, but the main part of the costume was done. 
I had originally used part of a set of Hello Kitty crystal decals to decorate the pink dress I found, and still had enough of the set left to replace the missing crystals and 
add some more sparkle to the dress. 

Unfortunately, Peach and Strawberry refused to hold still long enough for good pictures of their costumes. 

I’ll try to remember to switch them out for the nice ones when we do pictures this year . . . but no promises. 

 Pink shoes: $4  white tights: $3 for 3 pairs  
long sleeve shirt:$1
Dress, crystal decals, face paint 
and hat we had from before: $0
Total: $8

And last but not least . . .

Strawberry:
Strawberry has a thing for nice vampires lately. 
Last year she was Draculaura (from Monster High) 
and this year she decided to be 
Mavis from the Hotel Transylvania movies. 


 Luckily, Mavis has a fairly easy to re-create outfit 
(that stays pretty consistent). 
I never did find the sheer fingerless glove/ sleeves that she has (and I wasn’t paying $14 for a spider web pair from a costume shop), so I may need to look for a sheer top for her pictures. I also had to spray paint her high tops red (the only place I found any that would fit her only had grey) but I think it came together overall 
(I couldn’t find any kid size fangs in time, 
so I painted them on her bottom lip for the parade).

Black and red striped tights: $3  
High top shoes: $3  Black sweater dress: $1  
Spider drop earrings: $3 for 6 pair set
Red spray paint and 
face paint we already had: $0
Total: $10

So, for those keeping score . . .

Halloween 2017 kid costume total cost: $84

(for reference, that’s about the cost of 
2 ‘deluxe’ costumes at Target or Wal-Mart) 

or an average of $14 per costume!

Not too shabby (and nobody was covered in paper mache, cardboard or tinfoil *gives own mother the side eye*).


Anybody else go this in on Halloween costumes? And any ideas what I can do with 5 decent size pumpkins that 
didn’t get cut into jack-o-lanterns? 
Before they rot in my back yard?

Friday, November 10

Halloween, part 1 (the boys)

Or: how to put together 5 costumes (with a surprise 6th 2 weeks early) on a budget

I know it’s been a few years since I posted one of these (mostly due to real life craziness, not lack of things to share) 

*drumroll*

This year’s Halloween costumes for my boys 
(The girls will be part 2)!

So, the last couple of years I have really had to step up my costume game. This year, the first since 
I started working again, was even more so.

Elroy is all about cosplay level costumes. Bam-Bam can’t make up his mind (this year he decided as he was getting dressed for the costume parade Halloween morning that he was an entirely different character
than he had dressed as.

Because my children get all grouchy when they don’t eat, I have a strict under $35 per child budget for costumes (as the most basic, won’t even survive trick or treating store bought costume starts at $35). Thrift stores are my secret weapon for costumes (I love Goodwill, and Thursdays the color of the week items are $1 each). So long as the shape and material are right, it’s not impossible to adapt pieces 
to what you need without too much trouble.

Elroy:
This year Elroy and I have been watching Attack on Titan 
(a beautiful, but incredibly dark anime) and he decided he wanted to be the main character, Eren, who becomes a Scout to fight the titans who are destroying humanity.


As per usual the last few years, 
Elroy’s costume was the most expensive. 
All the clothing was from Goodwill (the cloak was a lucky find, but was not discounted and ended up being the single most expensive piece this year). The jacket was too small, so I split the side and sleeve seams and added a 2 inch wide strip of vinyl (on sale at the craft store) to each side. It’s still fairly tight across the shoulders, but I don’t want to split the back, too. We used more of the vinyl to make, the straps, waist and belt, and put him in a pair of Hunny’s tall boots. He couldn’t have any weapons, 
so we plan to make the sword box and flight canister pieces when we do his birthday pictures this year.


And here’s the final product:

 Jacket, shirt (a hoodie with the hood removed), 
and capri pants: $1 each
Cloak, with scout symbol already on back: $15
Dark Brown Vinyl for jacket, straps & belt: 
1 yard for $8, after coupon
Belt buckle: $5, Rivets, glue & boots we already had: $0
Total: $31 (just under, but still . . .)
  
Bam-Bam:
So, for my sanity in the lead up to Halloween, I have the kids decide their costumes early (so I have time to piece items and get things on sale). Like by 4th of July, early. 
Initially, he wanted to be the 11th Doctor 
(in the purple coat and old fashioned shoes). 
Then his teacher threw a big old wrench in my plans. 
All the 5th graders (I know!) had to do a biography presentation, the Wax Museum, which included dressing as their subject . . . on the 18th of October.

At this point, I had already found a grey coat for him that could be dyed purple as well as a black vest for underneath. 

Bam-Bam gets assigned Abe Lincoln. 

Ok, I can work with that.

I found plenty of portraits of him in not-black coats that are conveniently similar in style to the one I already got for him. And the black vest is tall enough to look like a waistcoat. I just need to find a passable cravat (I ended up finding a tie and tying it loosely at the fat end and tucking it in) and some dress shoes for him. But I was having a hard time finding any sort of old man boots for his actual costume . . . 

And then he changed his mind! 
He decided (after a birthday that did not include his own sonic screwdriver) that he would prefer to be a gunslinger from the old west instead (he found the plastic bullet bandoleer I had picked up for steampunk uses). 
Fine. Halloween morning, getting ready for school, Bam-Bam decides that he isn’t a gunslinger at all. 
He’s Van Helsing. At this point, I’m like . . . whatever, dude. 

Grey coat, vest, hat, belt, cowboy gun set and shoes: $1 each
Black pants: $8  Plastic bullet bandoleer of his own: $5
Jeans, shirt, brown western coat 
and bandanna we already had: $0)

Total: $19, for both costumes

Not bad, right?


Next up: the girls costumes!

Friday, June 7

Kid’s Quick, Dirty (and Cheap) Blaster Tutorial


Ok, my last few posts were pretty heavy. I thought I’d get off my soapbox for a bit and show you guys some last minute steampunk blasters I made for my kids.

We live near two great Renaissance Faires and were given some tickets. We had already gone to this faire opening weekend, so Hunny and I decided to take the kids for Steampunk & Time Traveler Weekend. I have been working on my gear for over two years but didn’t have near enough to outfit myself, my Hunny (who decided to wear her medieval garb with just a blaster) and our five hoodlums.

More accessories would be needed.

We only got the tickets a few days ahead, and our budget for anything is always tight, so the day before we went I took a break from the kids and hit the local dollar stores. A few hours (and $15) later I headed home with what I hoped would be enough supplies to give everyone that steampunk touch.

Kid's Steampunk Accessories photo DSCF1702.jpg


These are the pieces I put together for the kids to wear. The eagle pouch and belt set were for Elroy (he wore a frontier Doctor Who inspired look), the green blaster was for Bam-Bam (he went as a futuristic Indiana Jones type character), and the girls wore their pirate dresses from Halloween (without the jewelry) with one of the small blasters each.

Now, on to the tutorial . . .


Repainted Retro Water Gun Blasters photo smallspaceblasters.jpg


I got these mini squirt guns in a three pack on Target’s dollar aisle last summer. They were transparent colored plastic that showed none of the fun (Hunny says Duck Dodgers -esque) detailing. Since paint doesn’t always stick to plastic (and I didn’t want to be constantly repainting them) I wiped each one down with acetone nail polish remover to rough up the surface. These were cheap enough plastic (three for a dollar) that the plastic got cloudy and the paint has stuck no problem. I tried using the acetone on the other squirt guns (both transparent and opaque plastic), but as they were a dollar each, the plastic was of better quality and the acetone didn’t rough up the surface (the paint on these has not stuck near as well and they are already in need of touch ups).

First Stage of Repaint photo DSCF1692.jpg


I used my enamel paints for this (because I already had them), but if I had had more time (or a larger budget) I would have probably done a base coat of plastic friendly spray paint and then used the enamel paints for the detail work. The yellow tube gun and muzzle are actually from a ‘ninja blow gun’ I picked up at Dollar Tree (the paint does not like this plastic; these pieces came home from the faire almost entirely yellow again).

Base Coat and Beginning Details photo DSCF1693.jpg


Once the base coat was on you can really see how much detail was put into these molds, which I found fairly depressing. Someone had spent a good deal of time on each of these designs; not only are they being sold for next to nothing, they’re being molded in a plastic that makes all that detail invisible. *sigh*

After the base coat, it is simply a matter of deciding which details to use each specific color for (I try not to use more than 3 or 4 colors for any one piece, I prefer a more streamlined look) and painting (and repainting . . . and repainting . . . and touching up) until I liked the look of each one.

Finished Repaint photo DSCF1698.jpg


But what about the adults, you might ask . . . Hunny decided to be my ‘Companion’ (think Doctor Who, not Firefly) and carried the long muzzled blaster in a holster made out of a piece of cheap belt and a shoe lace (sorry about the focus, this one didn’t want to photograph nicely).
 
Long Muzzle Blaster and Holster photo DSCF1704.jpg


 I carried my ray-gun, wore my goggles, and wore this great pouch (found at Harbor Freight for under $20!) filled with dollar store bits.
 
Steampunk Hip Pouch with Accessories photo 73a12026-0722-45bf-91f6-8fb0d1cad8f3.jpg


In my kit were the painted out blow gun (2/3 of it anyway), a magnifying glass (I painted the rim copper with brass details), a pair of copper rimmed reading glasses (I got lucky with those, I got a pair for Elroy and just popped the lenses out so he could see, and painted 3 coats of iridescent nail polish on the inside of my pair so they looked like the lenses were made of mica), a plastic caliper from the same tool set as Elroy’s hammer (I repainted the handle, it used to be blue) and screwdriver. I also took a small wooden toy spoon, stained it using dark furniture scratch cover and glued some decorative plastic trim onto it. The trim was actually part of an old ‘viking’ helmet that I had used for another costume a few years ago and hadn’t survived the boys’ closet. I also got all of the decorations on Elroy’s belt pouch from this same helmet trim (I just painted out the pieces for the pouch). I even used one of the horns to make an alien tooth necklace for Bam-Bam’s costume.

Everything else was something we already owned (we keep an extensive set of dress up clothes for the boys as well as the girls, it comes in really handy and since I clearance shop after holidays, I’ve been able to pick most of the pieces up for next to nothing).

We had a good time at the faire. There were some really great steampunk outfits and weapons (one guy had a nerf rifle he had modified onto a 5 foot long bazooka, it still fired). We even got pictures with a guy doing a great 10th Doctor cosplay (staying in the character you’re dressed as). Since Elroy and I are both fans of the series (since the 2005 reboot), that was a definite highlight. Totally worth the late night putting all the props together the night before.

Anyone else do any cosplay? Feel free to share any tips and tricks in the comments.


Thursday, November 1

All Hallows Eve


Halloween at my house . . .
When I was pregnant with Elroy my due date was Halloween. I was thrilled but since he decided to come just a bit early, I spent the evening tending a newborn and the candy bucket at the door.
The following year we decided to have a 1st birthday (the ‘see everybody, we all survived the first year’) party.
Easy enough.
Everyone came in costume, broke a piñata full of Halloween candy, and had a grand old time. And while I was prepping for the party I made a decision that has affected how we do things ever since.
 I decided to get pictures of Elroy done in his costume to include with the invitations. 
The pictures came out so cute, and the response I got from everyone was so overwhelming, that the following year I decided to do costumed pictures again, even without the party.
And we’ve done so ever since.
Each kid gets the choice once they start school to do an ‘in costume’ birthday picture or a school picture. We haven’t purchased school pictures yet.
About a month before each birthday I either take the birthday kid to a same day photo place in our mall, or having Granddaddy come to the house and take the pictures (since my dad is an amateur shutter bug, with an eye to potentially making it a real job in the future). Since Bam-Bam’s birthday is earlier in the summer (and less than a month into the school year), and the girls birthday is just after Valentine’s day, I have to be more organized (and creative) with the kids’ costumes.
This year I thought I’d share what my brood will be wearing . . .
 
Elroy
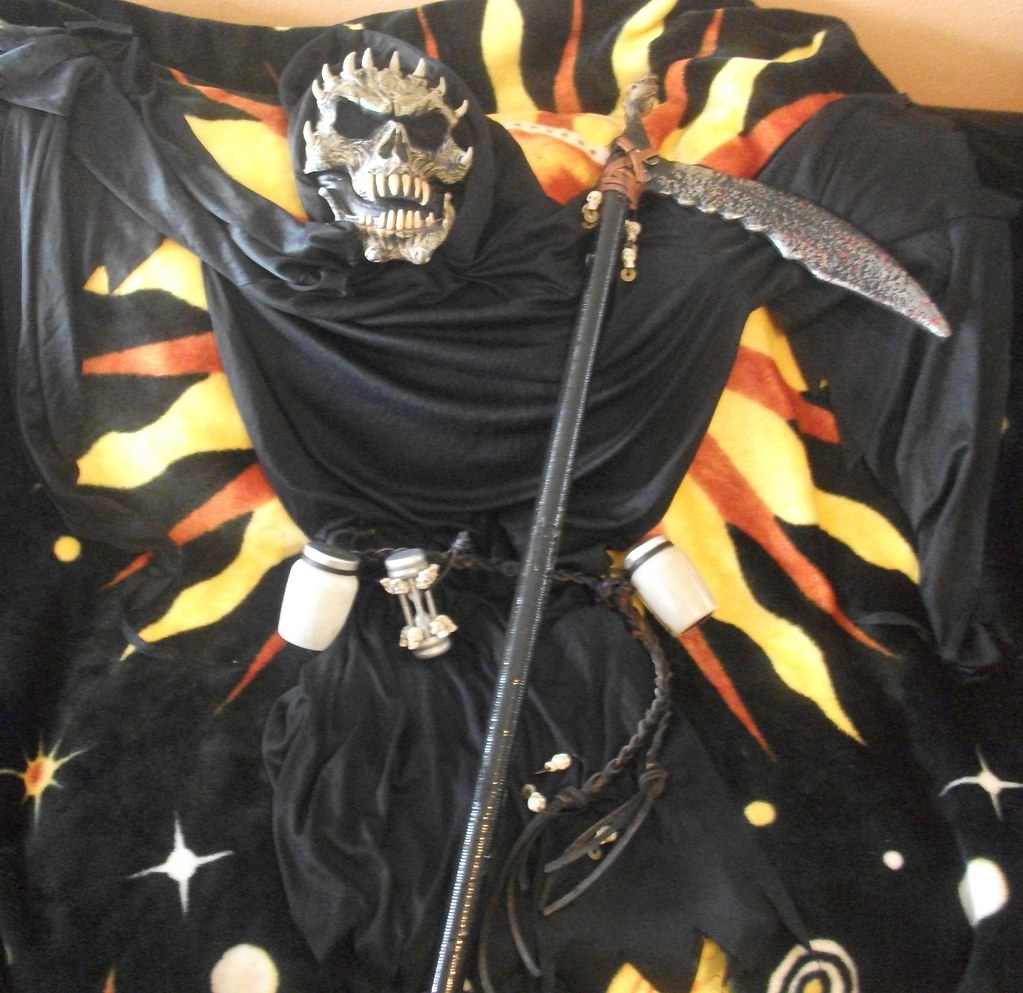
Usually I try to steer the costumes in a ‘let’s not scare your siblings’ direction, but as Elroy is in 3rd grade (hold on, I may need a moment here), I agreed with his choice of a grim reaper.
 
The boys’ school does a costume parade for Halloween, so for that morning he will be without both his scythe and the mask.
I found the robe for $3.50 at a small thrift store, the hour glass (plain wood) for $2 at a kitchen / home imports store. The skull beads were from a pair of bracelets (2 /$1) at a 99¢ store. I made the belt from some leather laces my sister gave me, and the scythe was a plastic sword (also dollar store) a cardboard wrapping paper tube, some black duct tape and a couple of pipe braces (about $3 each) from a hardware store. The mask we already had. For safety reasons I got him the light up jars ($3 each at Target) to make him more visible after dark.
So . . . a unique reaper costume for under $30 dollars, which is the price of the basic store bought reaper costume at any local retailer.
 
 
Bam-Bam 


This year Bam-Bam threw me a curve ball. I try to reuse the boys’ costumes by dressing Bam-Bam up in the costume that Elroy wore for that age (i.e. Elroy was a pirate for his 3rd birthday, so Bam-Bam was a pirate for his 3rd birthday picture). This year Bam-Bam was supposed to be a musketeer. I had the tabard, the boots, the belt, I had the blue hat ready for the feather. I thought I was ahead of the game.
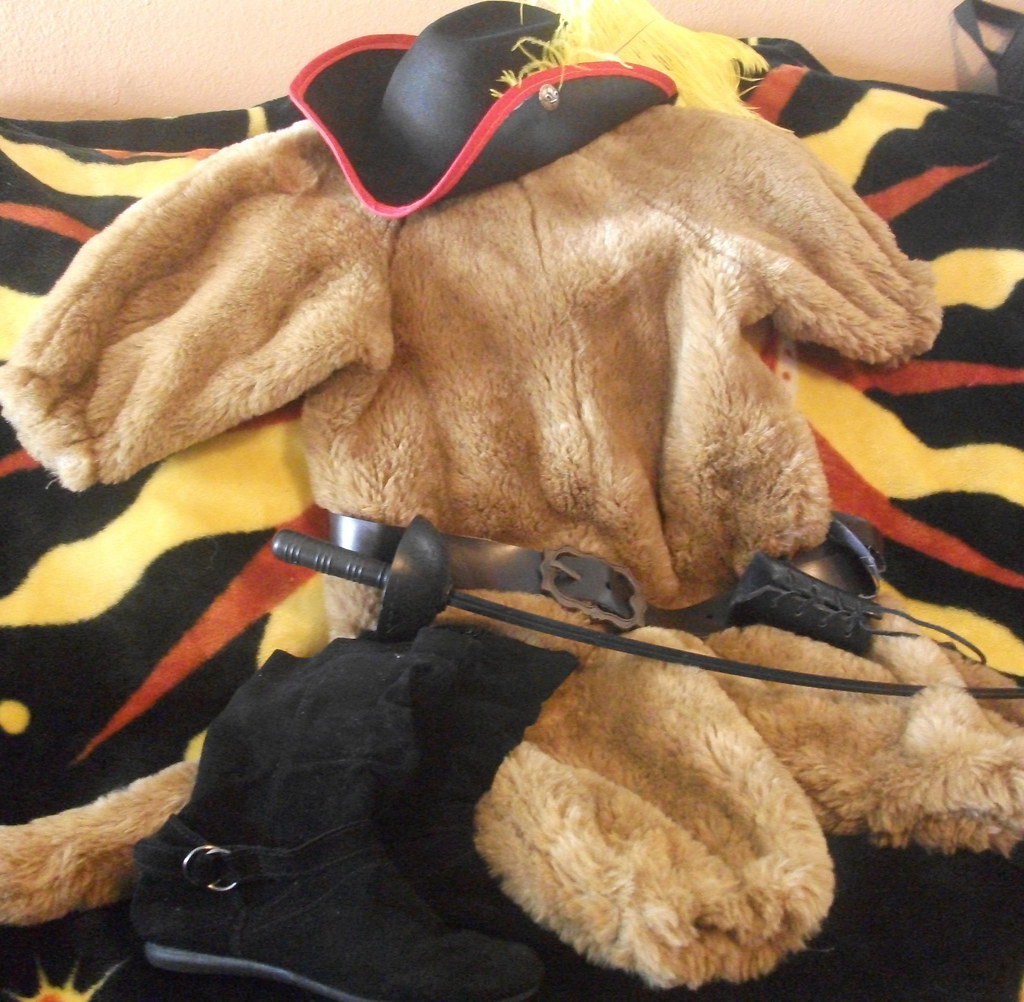
Less than a month to picture time Bam-Bam decides he wants to be puss in boots instead. And not just a cat in boots with a sword . . . the puss in boots from the Shrek movies. *sigh*
I couldn’t find anything to use as a cat suit. Not camel colored sweats, not leggings, not a leotard, not anything. Happily I was able to convince him to wear black dress pants and a collared shirt for his pictures, but it was a near thing.
In the nick of time (less than 2 weeks ago) my mom found a handmade faux fur cat costume at a thrift store. In the right color!  Yay Grandmommy!


The cat costume my mom found (and paid) for $8 at goodwill, the boots I bought 3 years ago (for Elroy’s musketeer costume) and this is, I think, the 4th costume they’ve been used with. The cape was from Elroy’s centurion costume last year (and near constant dress up since), the belt was from a Narnia play set one of the boys got as a gift a few years back. The sword was part of a zorro kit (came with a black plastic mask the kids immediately broke) from the 99¢ store for (you guessed it) $1.  The only part of the costume I had to manufacture was the hat. I started with a 99¢ store black foam cowboy hat ($1), glued on some red bias tape ($1.50 ish), stuck a yellow ostrich feather ($1 at craft store) through one side and safety pinned a button (already in my craft stuff) on to cover the slits.
Puss in boots costume  . . . Grand total under $5 for the hat and sword, $13 if I include what my mom paid for the cat suit. The only retail puss in boots costume I found started at $35, and looked horrible.
 
Raspberry, Peach and Strawberry   
I shop post holiday clearance for everything, so the girls were relatively easy. I’ve actually had the main pieces of their costume in the closet for the last 2 years. All I had to do was gather up the accessories. The girls actually wear their costumes the Halloween before their birthday (in February), and again for their pictures.
Although I prefer to let the girls pick their own clothes most of the time, they have worn matching Halloween costumes so far. I do hope to have a superhero girls year in the future but haven’t been able to get the costumes on clearance yet . . . 
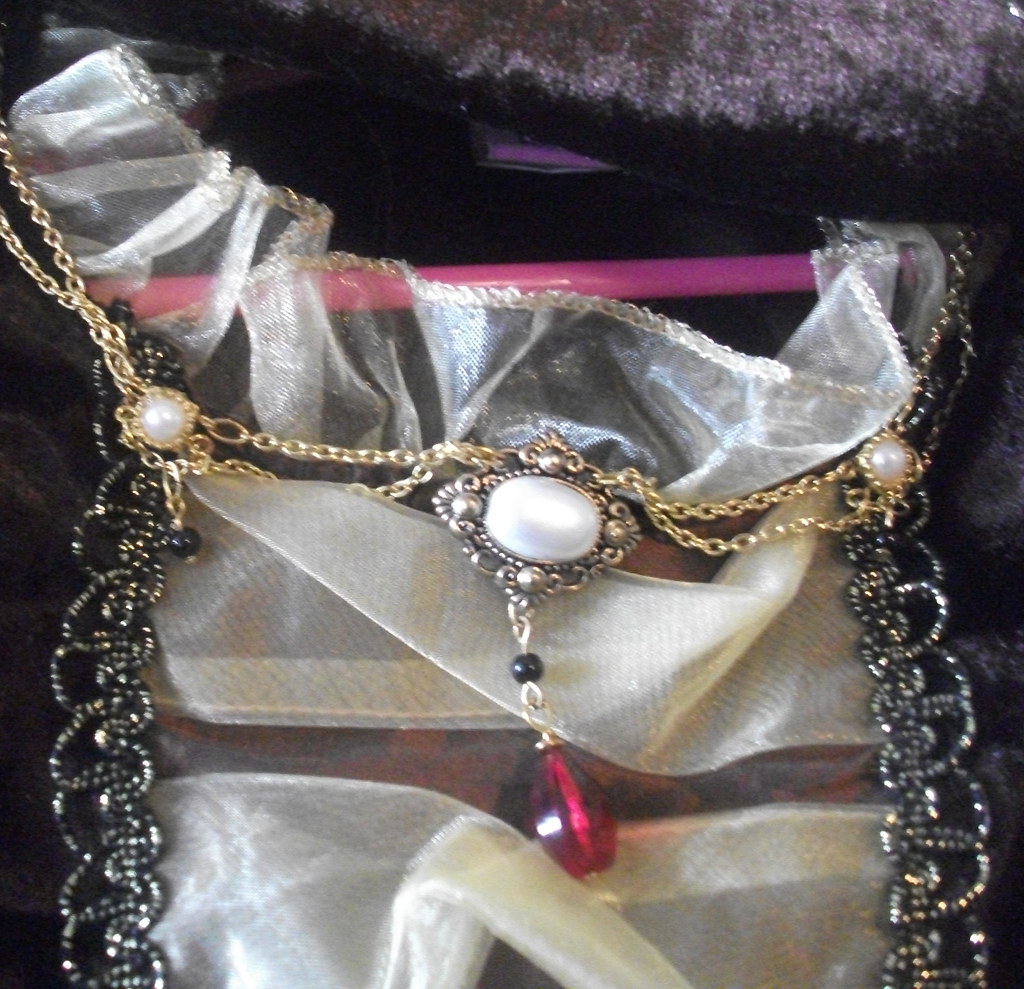
The dresses and hats came as a set at Costco 2 years ago, once again Grandmommy did the actual purchasing. I made the necklaces for their renaissance princess gowns last year (from buttons). The shoes I got (these are their everyday shoes) at payless over the summer. I hope to get them boots on clearance by their birthday pictures. For trick or treating I’ll put some black leggings under the dresses (for warmth), and for individual birthday pictures I plan to get a dollar store pirate sword as a prop.
Total cost : zero out of pocket for the girls this year.
 
Anybody else have a strategy for Halloween?    

Saturday, November 19

Ray-Gun Tutorial, part 2

So, in part 1 I put together the tank and barrel pieces for my ray-gun . . .

But how to hold it?

I still wanted the pistol style grip, even with the much longer barrel. My hope was to find a wooden rubber band or pop gun at a thrift shop or yard sale. Nope. So, online or in a local store . . . only if I was willing to pay $15 - $20, before shipping. I wasn’t. Could I have made my own? Probably, but with my limited access to my own tools (which do not include a scroll saw) and the craziness of actually getting to work on things that comes from having as many little ones underfoot as I do . . . not so much.

Fine . . . I guess I have to go with plastic.

Now, many people choose to repaint plastic guns (the Nerf ones in particular are quite popular and look very striking when painted out), but I was hoping for not just the look but the weight of a wood stock to help counter balance the length. I still hope to find one so I can trade the plastic one out in the future.

Back to the plastic guns . . . . After searching high and low at every discount, thrift and dollar store in my area, I ran across a cheap plastic gun at Wal-Mart. It was ugly. Boy was it ever ugly. A transparent neon green with blue accents and electric orange suction darts (I tried to find a picture, but apparently no one is willing to admit they have one).
But it had the shape I needed, with a grip and a clip set forward like a cross between a Glock and an AK-47 with a number of futuristic details and most importantly a flat top.
Once I painted it silver (love that enamel paint) and detailed it in gold, it actually looked like it would work.


I even had some cool brass cabinet hinges that looked vintage in my junk drawer that could hold the pieces together. It was finally coming together!


Then I tried to put it together . . . and learned that my hinges would NOT stay half-cocked at the angle I needed for long enough for the super glue to set. Which, as it turned out, the glue never did. To be fair, this was some cheap off-brand glue my mom had picked up for me, and some glues just don’t cure on certain types of plastic. So I had to scratch the hinge idea. After repainting (the glue did mar the finish) I used zip ties to hold the pieces together and craft glued the heck out of them. Once it had cured (overnight at least) I removed the zip ties and wrapped the tank onto the barrel using more of the gold floral wire (I made the coils out of this too).


Remember the threaded rod I scavenged from the old light fixture? After deciding how I would be wearing the gun (on my right hip) I used some silver craft wire to add the rod over the glued seam between the barrel and tank. I took a compass rose pendant and a plastic gear from a clock my boys broke, and made a sight that I glued on top of the tank. After looking at it, I decided the silver was too overwhelming and painted a large section of the grip a dark brown. I also touched up any glue points to look like silver solder.


So, here it is in all its finished glory. What do you think?


Hubby is so impressed with how it came out he plans to hang it on the wall with his Kit Rae Swords in the office.


I think he might be right . . . .


Next Time: my very first giveaway!

Saturday, November 12

Ray-Gun Tutorial, part 1

I liked the idea of getting to carry a weapon (since I’m usually pushing the stroller or holding little hands, spending Halloween armed had the draw of novelty) so I decided to make myself a ray gun.

Once again I was inspired by Jen of Epbot.com and her lovely gun made from an old candlestick and an art glass bottle. But she had been too crazy busy to post her tutorial (it’s finally up now), and as she is on a cross country book tour currently I think I’ll forgive her for the delay . . . Even if she isn’t coming out anywhere near me.

So I spent an afternoon browsing a local thrift store and found an interesting brass candlestick which broke down into 3 nice easy pieces. I could not find a colored glass bottle the right size (or a clear one for that matter), but I did have some other odds and ends lying around. I spent a long time looking for an aluminum bottle (or compressed CO2 canister) that fit my $5-or-less budget with no luck, only to run into a heavy PVC water bottle for $2 at my local Target.

It wasn’t perfect, but it would work. I put on a base coat of gray acrylic paint and then used some more of my metallic enamel paint (found in the model car and plane section of most craft stores) to give it the look of brushed metal. Things began to come together.

My original idea had been for a pistol, but as I was rummaging for odds and ends I ran across a metal pipe from a towel rack. Not only would this be a nice way to extend the barrel, it would give me an easier attachment point for the nozzle (inverted candlestick base). The stem of my candlestick was a long plain rod so I grabbed some fender washers and nylon spacers . . .


I was able to thread one washer onto the candlestick between the stem and the base. Then I alternated spacers and larger fender washers (gluing with craft glue as I went) down onto the stem to give a better transition and to give my gun a more retro ‘Buck Rodgers’ ray gun look. I didn’t have any spacers that would fit inside the barrel (and didn’t want to return to Depot to find any), but I did have strapping tape (duct tape would have worked, too). After the glue dried, I wrapped the far end and midpoint of the stem with enough strapping tape so that it would fit snuggly inside the towel bar (this took some trial and error), and glued it inside. I wrapped the seam with another layer of tape to hide it, and painted the tape, spacers and washers until I liked the effect.


But what, you ask, about the other end of the barrel? After playing around with some different odds and ends I decided to use it to attach the obligatory coiled wires from the end of the tank (PVC bottle). To do this, I got a plastic pipe cap


And used a nail heated over a gas burner to melt a hole big enough to put the end of the wires through. I bent the ends in place and hot glued them into the inside of the plug, and put a thin coat of craft glue on the top and slightly up the wires to give it the look (once I painted it silver) of a soldered joint. I hot glued the other end of the wires into the top portion of my candlestick (where the stem would have connected) and glued the cap from my bottle into the other side (where the candle would normally sit). I wasn’t thrilled about the flat bottom of the bottle but as I had just swapped out an old light fixture, I had the attachment pieces to rummage through. I was able to snag a threaded rod (added for looks latter) as well as the bottom cap and little ball finial all in an old weathered brass. Some wood craft discs, glue and silver paint later and my bottle had become a respectable ray gun tank.


More to come . . . .


Next time: Part 2 of my Ray-Gun tutorial,


and coming soon my very first give away!