Saturday, February 27

D&D Dungeon Tiles (Pt. 6): The Desert Temple and Oasis Tiles

 Now for the fancy desert tiles . . .

First up was the Ancient Temple. I wanted the temple to have an open feel, somewhere between the Greek Acropolis and the Egyptian Temple of Karnak with pillars, an altar and sandstone floors. Elroy liked the idea of this particular tile potentially showing up in hidden rooms as part of a secret cult in future games, so maybe in the future I’ll add some sort of sigil or pictograph (or he can place a statue) so that all the temples are connected. But for the moment, I decided to keep it neutral.
 
(Not sure what I’m talking about? 
Check out my D&D Tile series from the beginning . I’ll wait.)
 
I started by cutting my foam dais (it ended up being about 2” by not quite 2 ½”) and using my craft knife to create a deep bevel on the edges. The altar was a foam rectangle about 1 ¾” long by about 1” wide. I wanted to keep the edges crisp on the altar (as though it was a stone table resting on the dais), so it was one of the few pieces of foam that I didn’t end up beveling. I placed it in the upper third of the tile, but with space behind it so that characters could move around the entire altar.

I made the corner pillar bases by centering hexagonal foam pieces (I used the base of a glue stick for scale) on top of 1” squares. Again, the bases were beveled but the pillars were not, and all the foam pieces were textured using rolled up foil. Had I wanted to go for a ruined temple, I would probably have added some cracks, rubble and other textures, but since this temple was supposed to work for a variety of storylines, I kept things fairly simple.

I also added small piles of sand mixed with Mod Podge, making sure to limit it to one side of the dais and pillar bases as though a small amount had blown into the altar room over time. Once everything had dried, 
I gave it a seal coat to make sure all the sand stayed in place.
 

The Oasis Tile was a bit more challenging. I had originally planned to simply create a pool (similar to the Water Pool from the Castle Set), but Elroy asked for an island or playable area for more game options. I sketched a rough outline of where the edges of the pool and the island would be on the tile (again in the upper third) as well as a few steppingstones so that characters could get to the island. I cut out the rough island shape and steppingstones from single layers of foam but didn’t bother beveling any of the edges.

Then I tried something I wasn’t sure would work . . . I moistened the top layer of the cake board with a little bit of water, cut along the outline of the water and carefully peeled up the top few layers to give myself a reservoir for the water. I was very careful not to go down more than about a third of the way so that it wouldn’t affect the structural integrity of the tile. 
I glued down the island and steppingstones.  

Then I mixed up more of the sand with Matte Mod Podge and built up the edge of the pool. I also covered the island (including all the foam edges) and the rest of the desert around the oasis. Just like on the Desert Frame and Tile, I added small outcroppings of the small quartz rock scatter wherever there was too much open sand (and put an extra drop of Mod Podge on to keep them in place). I used the foil on the steppingstones so that they looked like large boulders instead of sandbars and set the whole thing aside to dry overnight. 
I added the sealing coat the next day.
 
Once the Temple and Oasis tiles were sealed, I painted them the same way I had for the rest of the Desert Set: I painted a base coat of camel craft paint and used a combination of overbrushing and dry brushing in a selection of khaki and cream tones to get a sun-beaten sand look. I also used a light grey to pick out some of the larger rocks and the top of the steppingstones and black on the temple altar stone (I only lightly dry brushed the altar with a light dusting of cream to pick out a few details).   


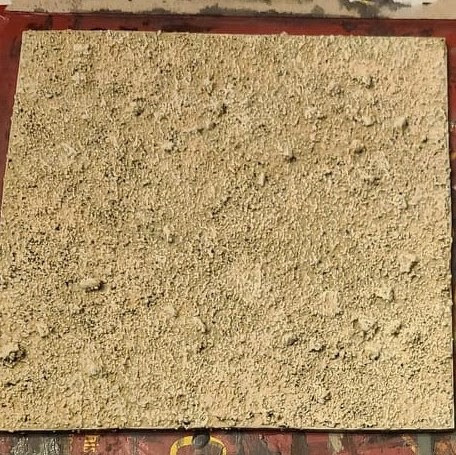
I used the same brown wash that I made for the rest of my Desert pieces. While it was primarily a burnt umber, I added a few shades of chocolate brown, red and camel to enhance the color of the wash. I weighted down the corners as the wash dried, to help correct any warping from the moisture in the Mod Podge and wash. The Temple didn’t have tons of texture for the wash to stick to, so it turned out noticeably lighter than the other Desert pieces, but I kinda like how the contrast defines the edges so I don’t plan to repaint it. 

Now that all the pieces were painted, I put on 2 to 3 coats of the 
Spray Polyurethane (specifically the Minwax Fast Dry, because it 
doesn’t melt foam) to protect the finish.


But what about the water, you ask . . . I used another large tube of clear 5 minute epoxy. I had learned from my previous attempts at water and only added one small drop of blue acrylic paint to the epoxy resin and carefully poured it into the reservoir I had created around the island. 

I used a toothpick to spread the resin between the stones and up to the edges of the sand. I took perhaps longer than I should have, as the resin was thickening enough to create some dips and swells along the sides. These don’t detract from the overall look and I’m very happy with how this tile came out. If you look closely at the shoreline, you can see the texture in the bottom of the pool because the acrylic paint starts to fall out of suspension as the resin sets.


While the resin cured, I decided that the temple was too plain and needed some accents. I had picked up a package of spider confetti around Halloween, but I didn’t like how flat the spiders looked on the tile. So, I grabbed my fabric paint and gave the spiders some depth. I wasn’t really happy with how blobby the spiders ended up either but then it hit me. 

Not spiders; scarab beetles. 


After looking at a ridiculous number of scarab beetle pictures (I swear, someone at Google is very confused by my search history), I cut off the first set of legs and trimmed the carapace to more of a point on a few of the confetti spiders. Then, I covered them with black fabric paint and used a toothpick to press in wing details once they were mostly dry. 

The bodies flattened a little more than I liked, so I carefully added a second layer of fabric paint just along the carapace, leaving a small gap between and above the wings. Once that layer had dried, I used some iridescent nail polish (specifically Peace & Love & OPI) on everything but the head and legs 
and glued them on once they dried.


Now, I will let you bask in the loveliness of these tiles in the desert Frame. Bask, I tell you. Bask!


And that’s the Desert Set finished. Elroy really wants a pyramid topper for this set, so that has been added to my list of Topper ideas for future projects.
 The final set ended up going in an entirely different direction than 
I had planned, but it came out so pretty.


Saturday, February 20

D&D Dungeon Tiles (Pt. 5): Building the Desert


Elroy and I went back and forth on how this set should look a number of times. He had no interest in trying to use any of the Castle tiles with the Desert Frame, so I didn’t bother with making a foam base for this set. 
I made the Desert Frame and three insert tiles: a Basic Desert, 
a Desert Oasis and an Ancient Temple.

(Not sure what I’m talking about? 
Check out my D&D Tile series from the beginning. I’ll wait.)

I wanted to lift the sides of the frame as though characters were traveling in the valley between two sand dunes. So, I replicated the bases of the surrounding dunes by adding strips of foam on the outside edges of the right and left sides and freehand drawing the approximate widths of the edges of the sand dunes on either side, straight onto the frame.

 On the shallower ‘windward’ side of the dune I glued a wider base only one layer of foam high.  For the ‘leeward’ side, I chose to stack narrower pieces of foam two layers high to simulate the steeper slope on that side. I cut one side of the foam strips in an uneven, wobbly line and brushed that side with acetone to smooth the edges for a more natural look 
(this step ended up being mostly unnecessary once I added the sand texture). 


I didn’t have any sand at home (the days of playing in the sand box having long since passed at my house) and I didn’t want to buy a full bag from a construction supply store, so I checked out my local Dollar Tree. 
They had bags of sand and small rocks for vase filler in a variety of colors on the candle aisle. I grabbed a bag of sand and a bag of 
small quartz scatter to use for desert texture. 
I ended up using less than half of each bag for all of the remaining tiles, leaving me with plenty of my $2 worth of sand for future projects.
 
Using my Basic Desert Tile to practice my technique, I poured out a puddle of Matte Mod Podge onto an uncut foam tray and mixed in sand. I used an old brush to scoop and spread out the sand mixture on the tile relatively evenly. Over time the silica in the sand pulls moisture out of the Mod Podge, so work in smaller batches to make sure it sticks. Then I scattered the small rocks around on the tile wherever the texture was too uniform. I added drops of Mod Podge to the tops of the rocks both to keep them from falling off and to enhance the visual of them growing up out of the landscape.
 
I did the same thing on the Desert Frame, making sure to put clumps of rock outcroppings and sand along the edges and tops of the dunes. 
I let the tile and frame dry overnight and then painted a coat of 


After that dried, I painted a base coat of camel craft paint and used a combination of overbrushing and dry brushing in a selection of 
khaki and cream tones to get a sun-beaten sand look. I then used a light grey to pick out some of the larger rock outcroppings. 


Instead of a black wash, like on the Castle tiles, I made up a brown wash for my Desert pieces. While it was primarily a burnt umber, I added a few shades of chocolate brown, red and camel to enhance the color of the wash. I weighted down the corners as the wash dried, to help correct any warping from the moisture in the Mod Podge and wash. 


On to the specialty tiles . . .


Saturday, February 13

D&D Dungeon Tiles (Pt. 4): Adventures in Resin

I admit, this step was the most intimidating for me. I had never worked with resin although I had wanted to get into it for some time. After watching a few more terrain videos, including this one
I went to the hardware store to grab some clear 2-part epoxy.
 
(Not sure what I’m talking about? 
Check out my new series from the beginning. I’ll wait.)
 
Since I was more concerned with price and cure time than perfect clarity or bubbles, I came home from the hardware store 
with a couple of the larger size tubes of this:


I found them for about $5 for the smaller size, and $6 for the larger size. Since I wasn’t sure how much resin I would need, I grabbed a large tube for each tile. I used clear plastic disposable cups to mix and color my resin (the medium, straight sided ones). Each epoxy tube came with a small wooden applicator, but they were too small, so
 I grabbed a couple of craft popsicle sticks 
and a few toothpicks to spread the resin.
 
I also used blue painter’s tape to dam up the edges and grout lines that went beyond where I wanted the resin (on both tiles). This was nit-picky and obnoxious and was a bit more work on the water tile than was really necessary (it was, however, very useful keeping the acid pools separate).
 
I started with the Water Pool. Once I had mixed the resin, I added a drop each of 2 different colors of blue craft paint. This was far more than I needed and made the resin much more opaque than I had hoped. I decided to go ahead instead of tossing the resin and mixing up another batch. I carefully poured the resin onto the recess on the water tile, using the toothpicks to drag it into crevices and smaller gaps between the foam squares. Due to my inexperience, I overfilled the water pool, leaving the top uneven 
and a weird divot over a set of grout lines. 


I have since tried using Gloss Mod Podge as a fill/ texturing agent to help repair the weirdness of the water pour. It’s better with the ripples and waves, but I plan to add at least 1 more layer for depth 
before I call the Water Pool Tile done.


And now for the Acid Pool. 
This time I only used 1 drop of electric green paint for the entire tube of epoxy. This gave the acid a much more viscous, slimy look while still allowing details to show through in the shallower areas. It reminds me of ectoplasm from Ghostbusters. I was much more careful with my pour for this one 
and managed not to overfill it. 

A fun aside about this epoxy. Acrylic paint doesn't mix into it completely; so as it cures, some of the paint starts to fall out of suspension and settles into the crevices. This exaggerates the appearance of  depth as the color intensifies at the bottom. I’m quite happy with how this tile came out.


I ended up using resin on another tile (in the Desert Set) and on the last Frame I made. The builds for those sets were more elaborate, so I’ll touch on the resin more once we get there. I also made some light weight, free floating scatter pieces including a couple of foam tables and a fire pit. 


Originally, I had planned to make a throne room out of one of the castle tiles, but we didn’t like how it sat in the playable area. I hope to make a set of toppers using 9”x 9” cake boards that will sit on top of the frames. 
My current plans for Castle Toppers include 
a Throne Room, a Cathedral and possibly a barracks.  
 
Now, on to the next set.


Friday, February 5

D&D Dungeon Tiles (Pt. 3): The Castle Frame and Pit Trap

Now that I had most of the Castle Tiles ready for painting, 
it was time to work on the Castle Frame and Pit Trap Tile.
 
(Not sure what I’m talking about? 
Check out the beginning of my new series. I’ll wait.)
 
First up, the Castle Floor Frame. This is a 12”x 12” Wilton cake board with a 6”x 6” square cut out of the center. I trimmed and beveled the edges, both the inside and outside borders. Then I found the center point, top and bottom. Just like with the inner tiles, I measured 1” to each side of the center point and connected the lines top and bottom. I then drew lines every 2” on each side of the center row. I rotated the frame to the unmarked side and 
repeated the process until I had an even, centered grid.

Because the center goes through a row of squares instead of between them, this put the outside edge at 1” from the next row over. This means that the row on the inside edge of the frame is made up of full squares and the outside edge is 1”x 2” rectangles (square cut lengthwise) 
with a 1”x 1” block in each outside corner.
 
Here’s a picture of the frame with and tile so you can see how they line up:


Just like with the tiles, I used a paintbrush to brush the bottom side of the foam squares with Matte Mod Podge and placed them on frame, keeping a couple of heavy bottles nearby to hold pieces in place if they started to lift.

The Pit Trap was similarly challenging. I decided that a 1” border would look best. Since this was for my final 6”x 6” castle tile, I cut 2 foam squares in half and cut a 1”x 1” block out of one corner of 4 more squares (I used them for the outside corners on the frame). This gave me 4 1”x 2” rectangles and 4 “L” shaped corner pieces. I now had a tile border (that lined up with the frame) 
with an empty square in the middle.

But how to make spears that won’t poke out above the foam border? 

3 words: Dimensional Fabric Paint.


Yup. That stuff. 

It’s really important to use a bottle with the tip for this, a brush is going to make it significantly harder. I use this far more often than most people would expect, and only rarely on fabric. This time, I freehanded a grid with alternating rows of 4 and 3 spear points with approximately ½” of vertical space between the rows. Then I made little Hershey kiss shapes with the fabric paint on each spear point. As they dried, the tips flattened out a bit, so I occasionally added new tips to the spikes to keep them pointy.
 
Once my tiles had dried, I repeated the texture and details from the last post.  The frame and pit trap got a quick and dirty stone finish by balling up some aluminum foil and pressing it into the foam to create a slate or travertine texture. I used the craft knife to trim any foam that was too close or didn’t leave enough of a grout line to line up nicely. Then I ran a ball point pen along the grout lines to gently bevel the edges of the foam. 
I also used the craft knife to give a deeper bevel to the foam on the edges. 


After everything was dry, I painted a coat of the 
Black Magic Craft Foam Sealer and let them dry overnight.
  
Now, I did make one more tile for the Castle Set: a Wooden Tavern Floor. 
I cut 1/2" strips of foam into 1", 2" and 4" lengths and arranged them to give a subtle 2" grid to the floor joins. Before I glued the strips on, I added wood grain by running a wire pet brush (because I had it on hand) in one direction along the top and sides of each board. I used an upholstery tack to put in nail holes at the ends of each board (you can totally use a toothpick, I just liked that the tacks have square tips). I also leaned into the gouges and snags from cutting the foam. About half of the boards I used were underside up 
to give the floor a more worn feel.


On to paint!
 
Elroy and I looked at the castle tiles and he decided they looked like slate, so I chose a selection of grey and cream acrylic craft paints and got to work. 
I started with a base coat of a dark grey (somewhere between slate and charcoal) and overbrushed (like dry brushing, but with slightly more paint on the brush) the foam with a medium grey. This will become the dominant tone for the stone. The next coat was a dry brush of a light grey, followed by an even lighter dry brush coat of ivory. I used a similar process for the wood floor, just in varying shades of brown instead of black.
 
Then it was time for the detail painting.

Slate tends to have more oxidized, rust colored patches mixed in on large tiles. So, I thinned a mix of red and dark brown with some water and brushed it on sections that were fairly flat, or just needed an accent. I did not use this on every tile (I followed the same loose ‘less than half’ guideline from the worn tiles), and I don’t think I covered more than 1/4 - 1/3 
of the surface of the tiles I did put it on.

The Pit Trap needed to look deeper than it was, so I painted the recess with a coat of a dark charcoal grey. I originally added more red to the rust wash and layered a few puddles around the points to simulate old dried blood. Elroy liked it, but I was worried that it wouldn’t show up once the piece was sealed. So I found a dark red and thinned it just a tiny bit and carefully splattered it (with a very small, stiff bristled brush) into the pit. I wiped off any drops that landed on the foam edges and let it dry. I used some old, nearly dry silver Rub ‘N’ Buff (a metallic, pigmented wax) on the points so they would look like metal. 


Once all the pieces were finished and dry it was time for a black wash to tone down the colors, settle into the crevices and pick out the details.

I made a quick blackwash using warm water with a drop of dish soap and a combination of black, dark brown, dark grey and dark purple paints. The variety of paint colors made the wash less of a true black, and more of a very dark grey. The wash got brushed over everything in the set 
and I let the pieces dry overnight.

After the wash dried, I added a few more splatters of thinned red to the Pit and recoated the points with Rub ‘N’ Buff. 
Then I sealed all the pieces with 2 to 3 coats of Spray Polyurethane 
(specifically the Minwax Fast-Drying, because it doesn’t melt foam). 

This stuff:


A quick note. The spray poly really brought up grey and brown tones on all the pieces, changing the overall colors of the pieces. If you decide to make your own set, don’t be surprised if the final color is not what you were expecting.


Now came the next challenge . . . resin.