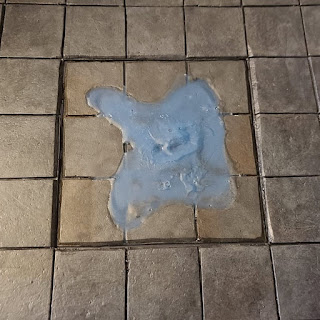
I admit, this step was the most intimidating for me. I
had never worked with resin although I had wanted to get into it for some time.
After watching a few more terrain videos, including this one,
I went to the hardware store to grab some clear 2-part epoxy.
(Not sure what I’m talking about?
Check out my new series
from the beginning. I’ll wait.)
Since I was more concerned with price and cure time than
perfect clarity or bubbles, I came home from the hardware store
with a couple
of the larger size tubes of this:
I found them for about $5 for the smaller size, and $6 for the larger size. Since I wasn’t sure how much resin I would need, I grabbed a large tube for each tile. I used clear plastic disposable cups to mix and color my resin (the medium, straight sided ones). Each epoxy tube came with a small wooden applicator, but they were too small, so I grabbed a couple of craft popsicle sticks
and a few toothpicks to spread the resin.
and
a weird divot over a set of grout lines.
I have since tried using Gloss Mod Podge as a fill/
texturing agent to help repair the weirdness of the water pour. It’s better
with the ripples and waves, but I plan to add at least 1 more layer for depth
before
I call the Water Pool Tile done.
And now for the Acid Pool.
This time I only used 1 drop
of electric green paint for the entire tube of epoxy. This gave the acid a much
more viscous, slimy look while still allowing details to show through in the
shallower areas. It reminds me of ectoplasm from Ghostbusters. I was much more
careful with my pour for this one
and managed not to overfill it.
A fun aside about this epoxy. Acrylic paint doesn't mix into it completely; so as it cures, some of the paint starts to fall out of suspension and settles into the crevices. This exaggerates the appearance of depth as the color intensifies at the bottom. I’m quite
happy with how this tile came out.
I ended up using resin on another tile (in the Desert
Set) and on the last Frame I made. The builds for those sets were more
elaborate, so I’ll touch on the resin more once we get there. I also made some
light weight, free floating scatter pieces including a couple of foam tables
and a fire pit.
Originally, I had planned to make a throne room out of one of the castle tiles, but we didn’t like how it sat in the playable area. I hope to make a set of toppers using 9”x 9” cake boards that will sit on top of the frames.
My current plans for Castle Toppers include
a Throne Room, a Cathedral
and possibly a barracks.
Now, on to the next set.
Next up: Building the Desert


No comments:
Post a Comment