Elroy and I went back and forth on how this set should
look a number of times. He had no interest in trying to use any of the Castle
tiles with the Desert Frame, so I didn’t bother with making a foam base for
this set.
I made the Desert Frame and three insert tiles: a Basic Desert,
I made the Desert Frame and three insert tiles: a Basic Desert,
a Desert Oasis and an Ancient Temple.
(Not sure what I’m talking about?
Check out my D&D Tile series from the beginning. I’ll wait.)
Check out my D&D Tile series from the beginning. I’ll wait.)
I wanted to lift the sides of the frame as though
characters were traveling in the valley between two sand dunes. So, I replicated
the bases of the surrounding dunes by adding strips of foam on the outside
edges of the right and left sides and freehand drawing the
approximate widths of the edges of the sand dunes on either side, straight onto the frame.
(this step ended up being mostly unnecessary once I added the sand texture).

I didn’t have any sand at home (the days of playing in
the sand box having long since passed at my house) and I didn’t want to buy a
full bag from a construction supply store, so I checked out my local Dollar
Tree.
They had bags of sand and small rocks for vase filler in a variety of
colors on the candle aisle. I grabbed a bag of sand and a bag of
small quartz
scatter to use for desert texture.
I ended up using less than half of each bag
for all of the remaining tiles, leaving me with plenty of my $2 worth of sand
for future projects.
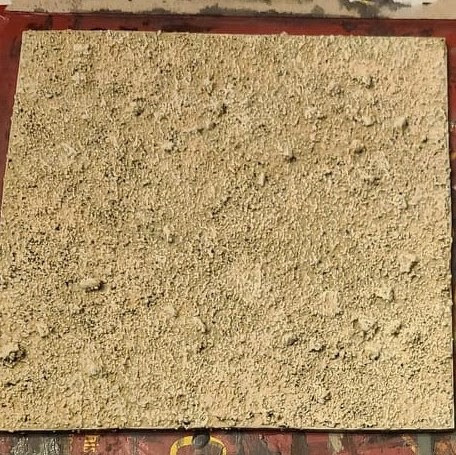
Using my Basic Desert Tile to practice my technique, I
poured out a puddle of Matte Mod Podge onto an uncut foam tray and mixed in
sand. I used an old brush to scoop and spread out the sand mixture on the tile
relatively evenly. Over time the silica in the sand pulls moisture out of the
Mod Podge, so work in smaller batches to make sure it sticks. Then I scattered
the small rocks around on the tile wherever the texture was too uniform. I
added drops of Mod Podge to the tops of the rocks both to keep them from
falling off and to enhance the visual of them growing up out of the landscape.
I did the same thing on the Desert Frame, making sure to
put clumps of rock outcroppings and sand along the edges and tops of the dunes.
I let the tile and frame dry overnight and then painted a coat of

After that dried, I painted a base coat of camel craft
paint and used a combination of overbrushing and dry brushing in a selection of
khaki and cream tones to get a sun-beaten sand look. I then used a light grey to pick out some of the larger rock outcroppings.
Instead of a black wash, like on the Castle tiles, I made
up a brown wash for my Desert pieces. While it was primarily a burnt umber, I
added a few shades of chocolate brown, red and camel to enhance the color of
the wash. I weighted down the corners as the wash dried, to help correct any warping
from the moisture in the Mod Podge and wash.

On to the specialty tiles . . .
No comments:
Post a Comment